How to install a Wall-Murals
Do not apply on vinyl or textured walls. Only apply on a flat, smooth and clean surface. For walls, we advise applying a coat of primer and a coat of paint to avoid possible residue or peel paint upon removal. Ideal paints are white or light color with a semi-gloss or gloss finish. If the surface has been freshly painted, please wait at least 1 week for the paint to fully cure. Bubbles can occur if the paint is still outgassing/flashing off.
STEP 1:
PREP YOUR WALL Proper preparation of your wall is critical! Repair any visible defects, smooth out bumps and patch holes to ensure your wall is smooth and flat. If possible, remove all picture hooks, light fixtures and switch plates. Wash of any dirt, hair, dust or residue from old wallpaper with a dry cloth or a duster. Do NOT use water to clean your wall before application. A perfectly clean wall will help the adhesive backing to keep its stickiness if repositioning is required.
STEP 2:
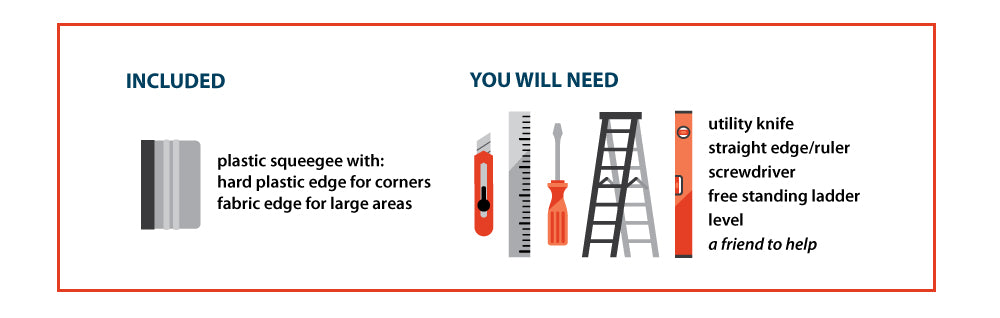
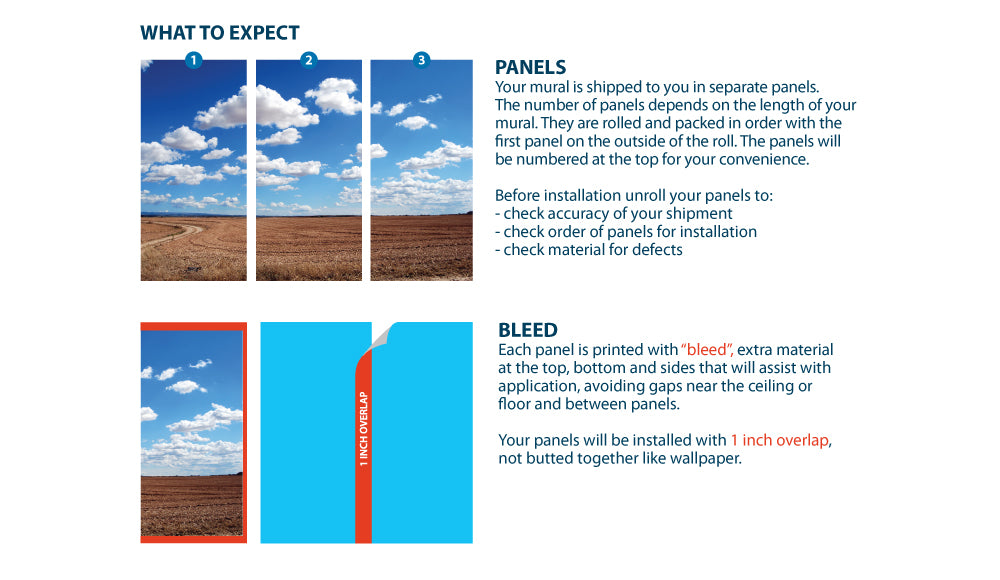
GETTING READY We recommend 2 people to install your wall mural. Open the sturdy Wall-Murals packaging tube. Inside you will find your wall mural. Look for the panel number on the back of each one.
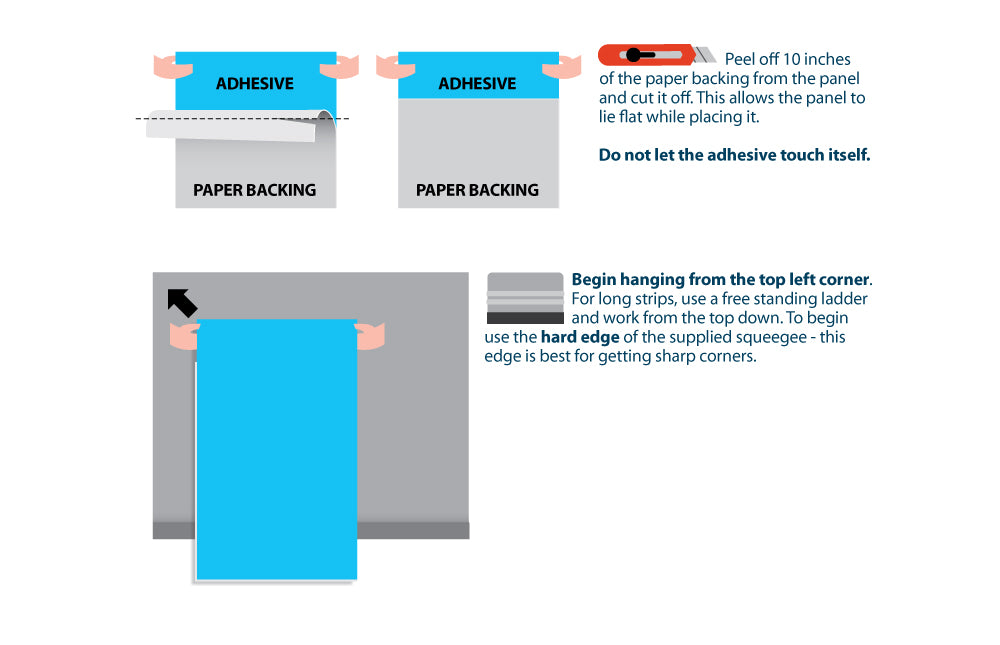
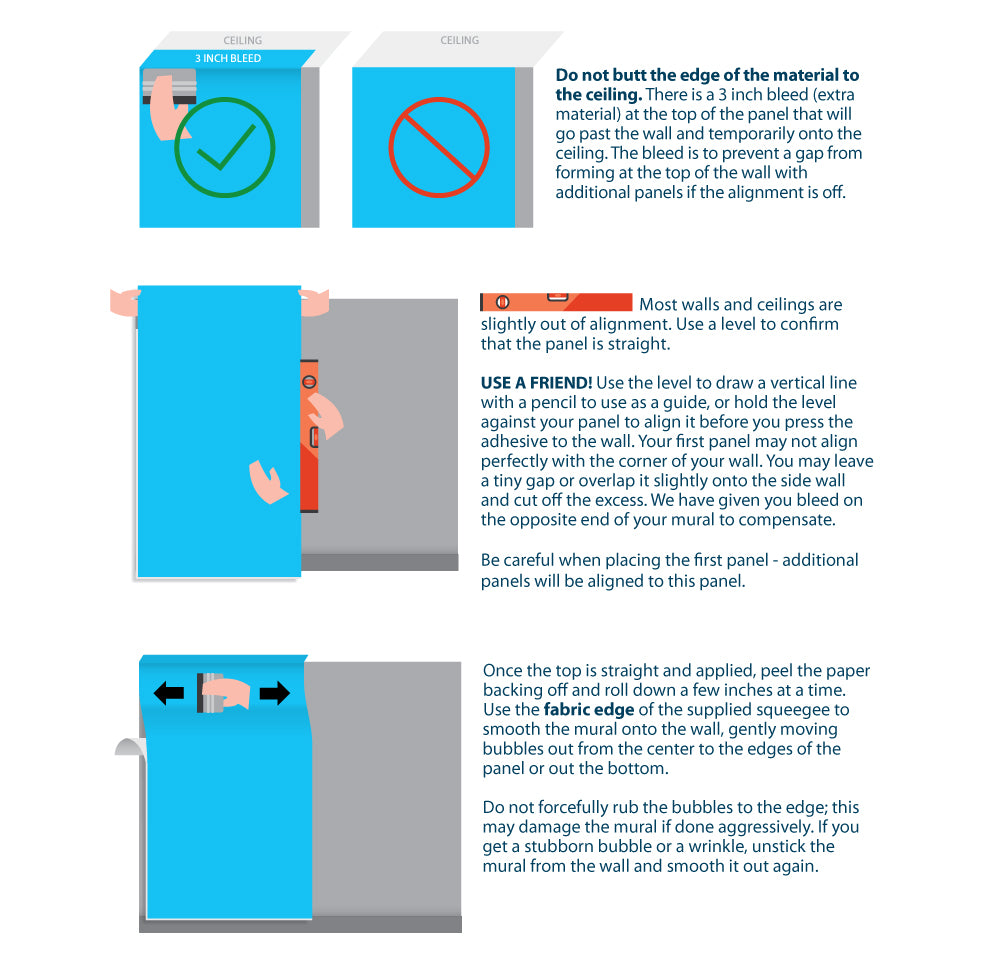
STICK IT! Remember that the success of the installation will depend on properly placing the first panel. Stick the top left corner of the panel to the top left corner of your wall. This is the easiest place to start. Using a smoothing tool or squeegee, smooth the top of the panel onto the wall. Do not use pressure to avoid any scratches. Peel off the rest of the panel by gradually and evenly pulling down the liner, a few inches at a time. We recommend having another person hold the bottom of the panel as you work your way down. Once the first panel is applied, and if necessary, remove any bubbles by gently pushing them outward with the squeegee.
STEP 3:
ADDITIONAL PANELS Start by aligning Panel#2 to Panel#1. Simply stick the panel against the edge of the first one, by matching the pattern of the mural.
STEP 6:
TRIM OVERAGE Once all panels have been applied, SLOWLY trim all the overage with an utility knife with a sharp blade (ie: Xacto knife). Follow the edges of your wall or ceiling to do so. You can also use a ruler to cut through a straight line. If needed, repeat this process to cut around outlets (if not removed prior to installation), fuse boxes, windows, doors, etc.
STEP 7:
REMOVAL PROCESS Slowly and gently pull the panels from the wall. Use your hand to gradually hold back the wall mural during this process. To avoid any damage to your wall while removing, keep the wall mural as flat and parallel to the wall as possible. We highly recommend to keep the backing liner (wax paper), so you can re-apply the wall mural to it. It will protect the adhesive from losing its stickiness and allow you to re-use your wall mural.